

Private DNS for Android
Block ads and trackers without installing anything extra using your Android's inbuilt setting called Private DNS.


Private DNS is one of the least known settings in Android, well at least to the non-tech savvy users. Private DNS can be found in all Android phones which have an Android version of 9+. Although in a lot of phones which have Android version 9, this feature is missing. Your Android version can be found if you navigate to Settings and simply tap on the About section. All details of your phone are available there.
Why Private DNS?
A lot of DNS providers provide an option of blocking ads using DNS. Ads getting blocked will also lead to an increase in faster speeds. Private DNS is also used to switch from the default DNS provider (which is mostly Google) to a non-Google DNS provider say for example CloudFare.
Getting Started
In this run through we are going to look at 2 ad-blocking DNS providers preferred by me - NextDNS and AdGuard. My personal favorite is NextDNS because it offer a wide range of ad blocking including customizing what you want to block. It even includes an allowlist in which you can add sites you don't wish to be blocked.
AdGuard
Let's look at one of the most simple setups for an ad-blocking DNS -
- Navigate to Android
Settingsand use the search bar in your phone and search upPrivate DNS. If you do not find the setting, your phone does not support it, but you have an option of running an AdGuard VPN (Virtual Private Network) to block ads. - Once you find
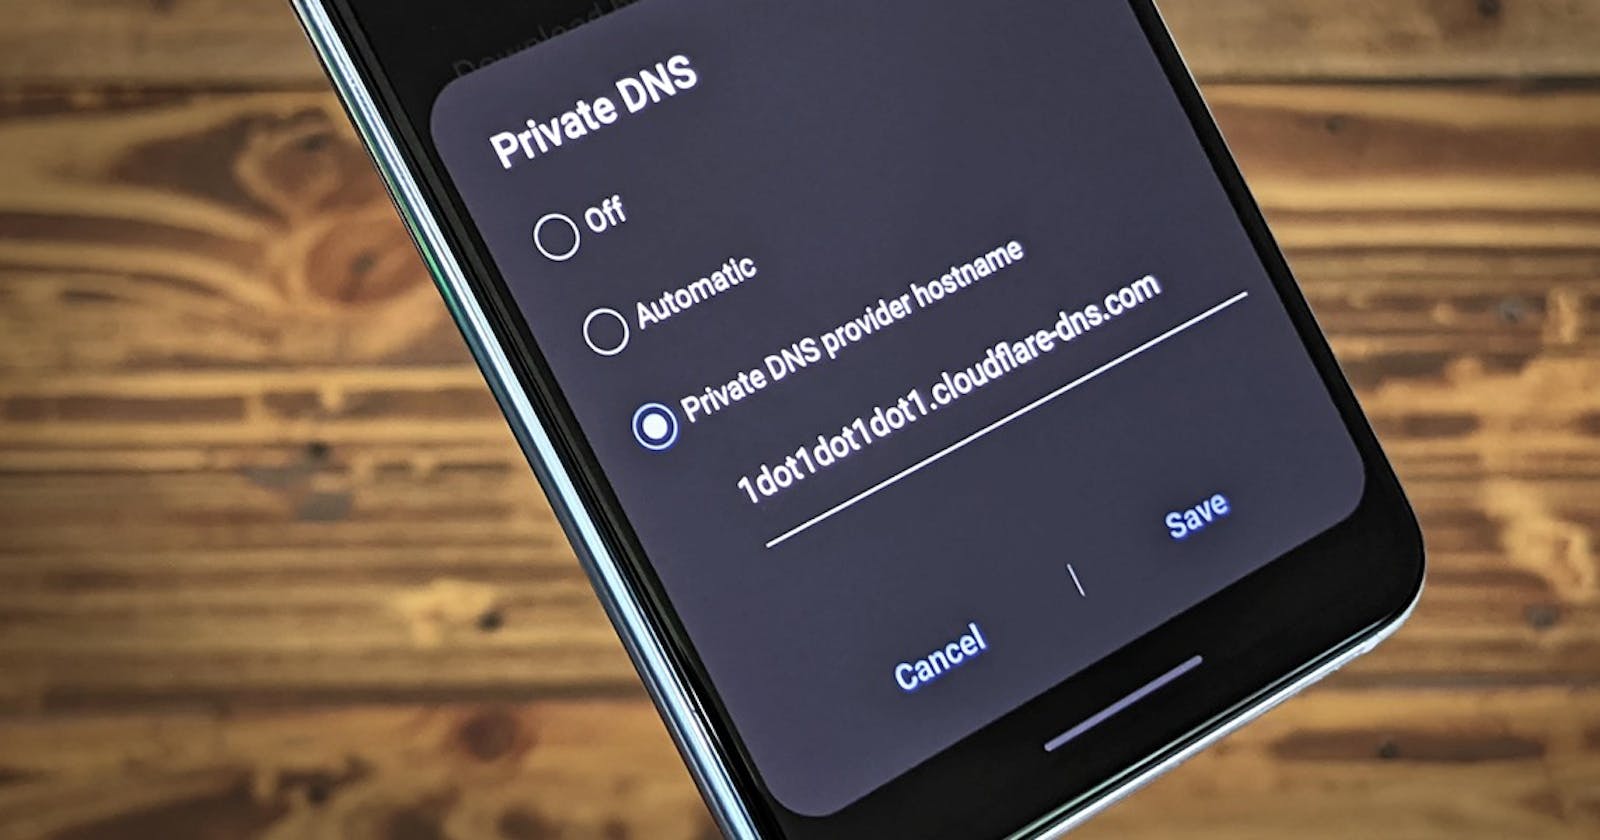
Private DNSclick on it and set the options shown on it toManual. - In the input field input the following without anything extra
dns.adguard.com. That's it you're done!
You can test your ad blocker DNS by visiting a news site and watching all those pesky ads get blocked!
NextDNS
Before setting up NextDNS one should know that this requires you having an account. Although a very simple bypass to this is simply using a temporary mail provider or just inputting a very random email while registering. NextDNS does not confirm nor checks if the email is real. Let's look at the setup for NextDNS -
- Head over to the signup page and enter your details. Once you do that you will be redirected to a
Setuptab. Scroll down to theEndpointscategory and find for theDNS-over-TLS/QUICoption and copy the code below that. - Open your Android phone settings, use the search bar in your phone and search up
Private DNS. If you do not find the setting, your phone does not support it, but you have an option of running an NextDNS VPN (Virtual Private Network) to block ads. - Once you find
Private DNSclick on it and set the options shown on it toManual. - In the input field input the code you copied over from NextDNS. You have now successfully setup NextDNS!
NextDNS Additional Setup
NextDNS offers a wide range of customizations not limited to blocking just ads. It's free plan is just more than enough for a regular user. Here are some features -
Security- This tab is present right next to theSetuptab and can be used to setup all the extra security you may require. All the options are very self explanatory and do not require additional explanation.Privacy- This tab has a great feature known as Blocklists, you can add and customize which filters you would like having. I personally recommend the AdGuard DNS filter and the Steven Black filters as they are quite extensive and kept updated. A critical filter you would see is a Spotify Adblock filter, personally that filter has never worked for me on Android, instead it has ended up causing problems when updating apps from the Google Play Store.Right below Blocklists is another great feature called Native Tracking Protection which can be used to block trackers operating at system level (sigh Windows for example has a lot of telemetry so this option effectively block them if you configure NextDNS for Windows).
Settings- The last tab here has an important option for you to choose: Enable logs or disable them. Logs can be used effectively to know what causes issues. For example you visit a site and it breaks due to NextDNS, you can head over to the logs and see what caused it to break hence fixing the issue or reporting it.If you enable logs NextDNS gives you two options: Retention and Storage Location. The first option is pretty self explanatory, for the second option go with Switzerland as this country has the best data privacy laws.
Final Thoughts
NextDNS obviously has a better advantage when compared to AdGuard and personally prefer NextDNS over AdGuard. Other players such as CloudFare (does not offer adblock) also can be setup in a similar way.
| NextDNS | AdGuard | |
| Blocklists | Easily customizable | Stick to company decided lists |
| Setup | Can be difficult for a non-tech person to setup | Easy to setup |
| Logs | Logs are collected but can be switched off | Logs are on by default and cannot be switched off |
| Account Requirement | Registering an account is compulsory | No account setup necessary |
| Uptime | No inbuilt uptime checker however a third party uptime checker has given a 99.6% | 99.95% uptime as provided by AdGuard themselves |